Ahh shadows. I’ve been putting this off because lets face it, 3D shadow mapping is not frickin easy. There are countless advanced algorithms for 3D shadow mapping to make shadows look as pretty as possible on our discrete-centric graphics hardware. Some of them are crazy complicated and quite difficult to implement. I’ve been messing around with 3D graphics programming for over 10 years now and let me say that shadows have always been just out of reach for me. This week, I decided to put an end to that.
As a plan, I’ve decided to keep things as simple as possible. I’m making a game here, not a game engine, so I wanted to get shadows working reasonably well, and get back to the game programming aspect of this project.
The basic outline of the simplest shadow mapping technique:
- Render the scene from the perspective of the infinitely far direction light (shadow pass) into a shadow-depth texture.
- Render the scene normally using the depth-information from the shadow-depth texture to determine whether or not a particular pixel is visible to the light or not (in shadow or not).
The Shadow Pass
Above, it sounds simple. In practice, there are many caveats. For starters, its absolutely critical to get the most of out of the “shadow-depth” texture in terms of resolution as possible. Thus, when rendering the shadow pass, we want to contain the entire scene into the light’s view with the constraint that we show as much (are as zoomed in) as possible. If we zoom in too little, we hurt the resolution of the shadow map. If we zoom too much, we risk clipping the scene resulting in some shadows being lost. Furthermore, we want to render this step with as simple of a shader as possible, to avoid unnecessary wasted computation on the GPU.
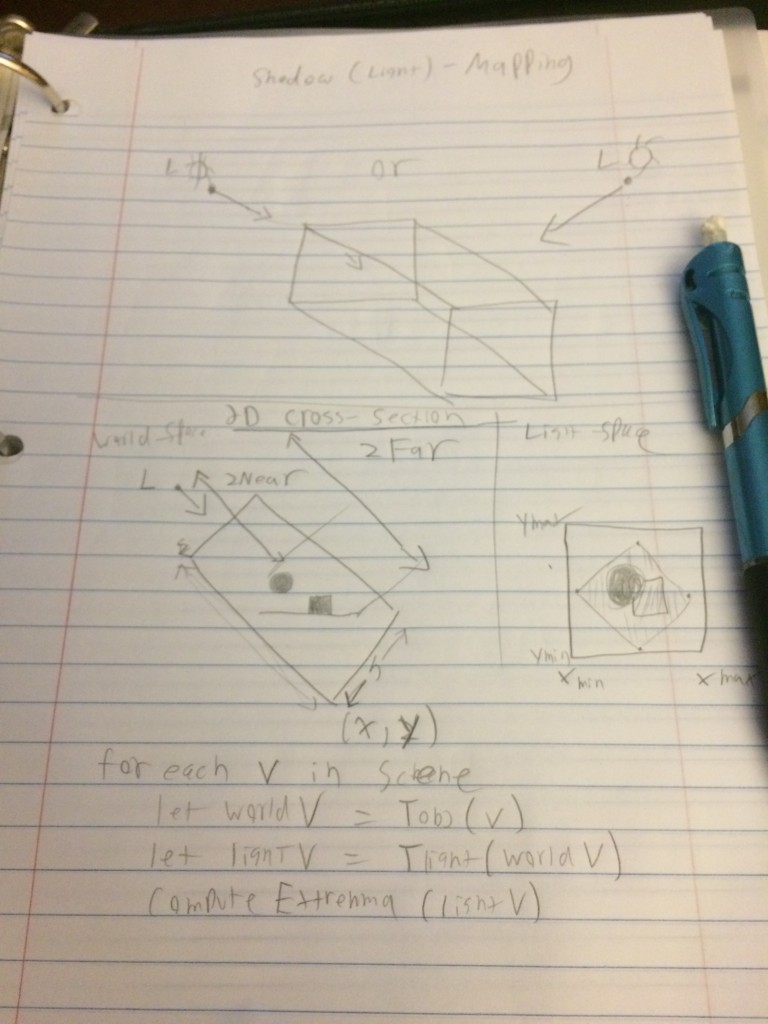
Going back to the optimal viewport containment (zooming) issue, this boils down to computing the optimal Ortho-box that the scene will be contained in. We’ll use this box as the parameters to the ortho projection matrix given during the light/shadow rendering pass. Optimally bounding the scene with this box presents a problem due to the fact that the box is in light-view-space coordinates, and all of our scene bounding boxes are in world-space. Trying to work through this last night, I resorted to pencil and paper.
The algorithm essentially involves grabbing the light’s “viewing” transformation which consists of a simple lookAt transform and applying it to the 8 corner vertices of the world-space bounding box of the entire scene. Once I have these coordinates in light-view-space, hopefully a computation of a new axis-aligned bounding box of these 8 points will be the ortho-box I’m looking for. It turns out, that this worked quite well.
The actual code of this algorithm ended up looking more like this..
|
1 2 3 4 5 6 7 8 9 10 11 12 13 14 15 16 17 18 19 20 21 22 23 24 25 |
if(lightPos.w == 0.0f)
{
float3 lightInvV = make_float3(lightPos.x, lightPos.y, lightPos.z);
lightInvV = float3Normalize(lightInvV);
mat4 depthViewMatrix = mat4MakeLookAt(boxPos.x+lightInvV.x, boxPos.y+lightInvV.y, boxPos.z+lightInvV.z, boxPos.x, boxPos.y, boxPos.z, 0, 1, 0);
//transform the bounding region into light-space
GrowableArray *boundingRegionVerts = [box generateVertices];
[self applyTransform:depthViewMatrix toVerts:boundingRegionVerts];
//calculate light-space extremma to properly bound the region in light-space
//(axis-align the new region to light-space)
Box3D *lightSpaceBox = [self calcLightSpaceBoundingRegionWithVerts:boundingRegionVerts];
boxPos = lightSpaceBox.pos;
boxSz = lightSpaceBox.dims;
mat4 depthProjectionMatrix = mat4MakeOrtho(boxPos.x-boxSz.x/2, boxPos.x+boxSz.x/2,
boxPos.y-boxSz.y/2, boxPos.y+boxSz.y/2,
boxPos.z-boxSz.z/2, boxPos.z+boxSz.z/2);
mat4 depthMVP = mat4Multiply(depthProjectionMatrix, mat4Multiply(depthViewMatrix, depthModelMatrix));
shadowMatrix = depthMVP;
return depthMVP;
} |
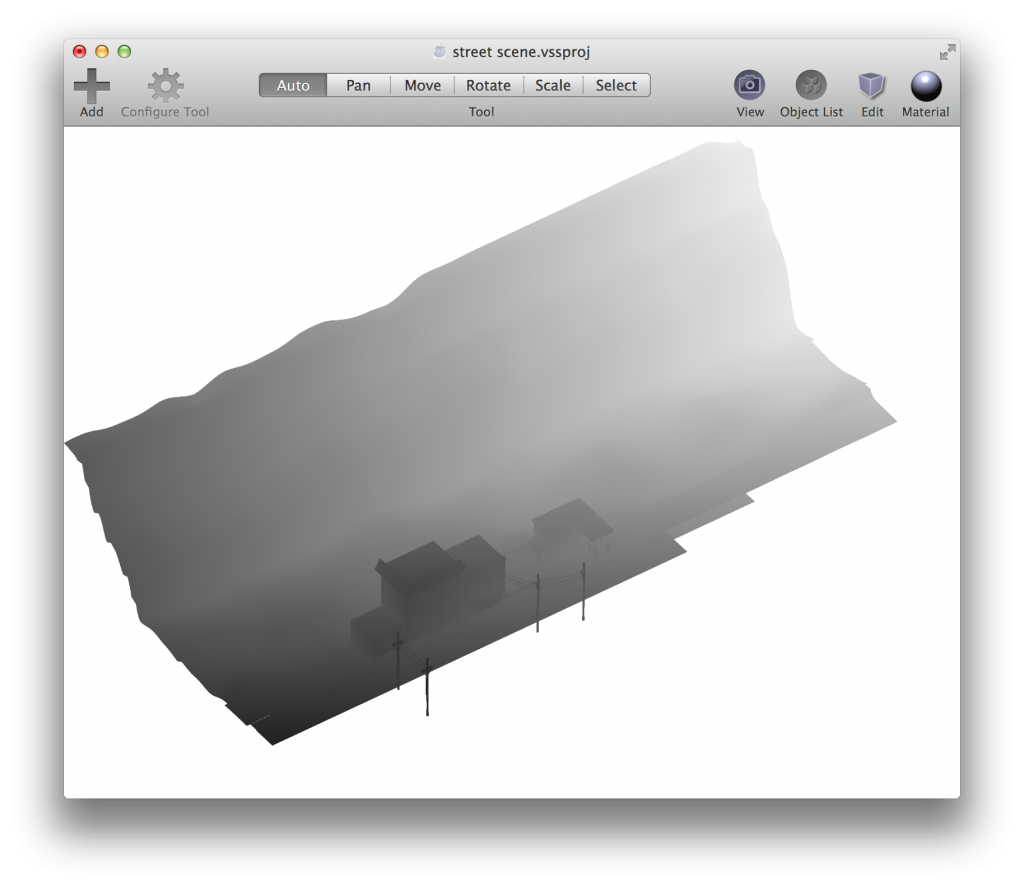
Below is a sample result of a shadow pass done using my cheap and simple bounding algorithm ran on our street scene (vantage of the light). Note that this is stored into a depth-component texture attached to the depth-attachment of an offscreen FBO.
Goooood.
The Shadow-Application (main) Pass
During the main rendering pass, I needed to modify my shaders to include the application of the shadows from the light-map. Alongside the light-map texture, I needed the a variant of the same “MVP” model-view-projection used to transform a world-space position into projected light-view-space coordinates. This matrix is commonly referred to as a “bias shadow matrix” because its optimized to express the result in a normalized texture-coordinate form that GLSL texture routines are expecting. In short, it simply applies the lighting-transform, divides the coordinates by 2 and then shifts them by 0.5.
|
1 2 3 4 5 6 7 |
mat4 biasMatrix = make_mat4(
0.5, 0.0, 0.0, 0.0,
0.0, 0.5, 0.0, 0.0,
0.0, 0.0, 0.5, 0.0,
0.5, 0.5, 0.5, 1.0
);
biasMatrix = mat4Multiply(biasMatrix, lightMatrix); |
Armed with the shadow matrix and the shadow map texture, I generate the needed shadow coordinate information in vertex shader. I also compute a shadow bias to combat a well-known phenomenon known as “shadow acne” essentially caused by z-fighting from the shadowmap texture.
|
1 2 3 4 5 6 7 8 9 10 11 12 13 14 15 16 17 18 19 20 21 22 23 24 25 26 |
struct Light
{
/*....*/
mat4 biasShadowMatrix;
};
uniform Light lights[1];
in highp vec4 position;
in mediump vec3 normal;
out float shadowBias;
out vec4 shadowCoord;
void main()
{
//Compute transformed normal
vec3 eyeNormal = normalize(normalMatrix * normal);
float cosTheta = dot(eyeNormal, normalize(lights[0].position.xyz));
float bias = 0.005*tan(acos(cosTheta));
shadowBias = clamp(bias, 0.0, 0.01);
shadowCoord = lights[0].biasShadowMatrix * position;
//......
} |
Lastly, in the fragment shader, I sample the shadow texture to determine whether or not the shadow coordinate of the given fragment is visible or not to the light. I can vary the visibility factor to be as dark or light as I want to achieve the desired effect. Note that I’m using a shadow sampler here. This special hardware sampler takes multiple samples of the shadow map for me and interpolates the results automatically to produce a smoother shadow edge.
|
1 2 3 4 5 6 7 8 9 10 11 12 13 14 15 16 17 18 19 20 21 22 |
uniform sampler2DShadow shadowMap;
in vec4 shadowCoord;
in float shadowBias;
void main()
{
vec4 highlight = vec4(0.0);
lowp vec4 color = vec4(1.0);
float visibility = 1.0;
//sample the shadow map to determine the shadow color (1.0 or 0.3, interpolated)
vec3 coord = vec3(shadowCoord.xy, shadowCoord.z-shadowBias);
visibility *= max(texture(shadowMap, coord), 0.3);
vec4 lightColor = computeLight(normalize(va_normal), ec_pos, 1.0, lightColorOtherSide, highlight);
color.a = material.alpha;
color *= visibility;
fragColor = (gl_FrontFacing) ? color*lightColor : color*lightColorOtherSide;
} |
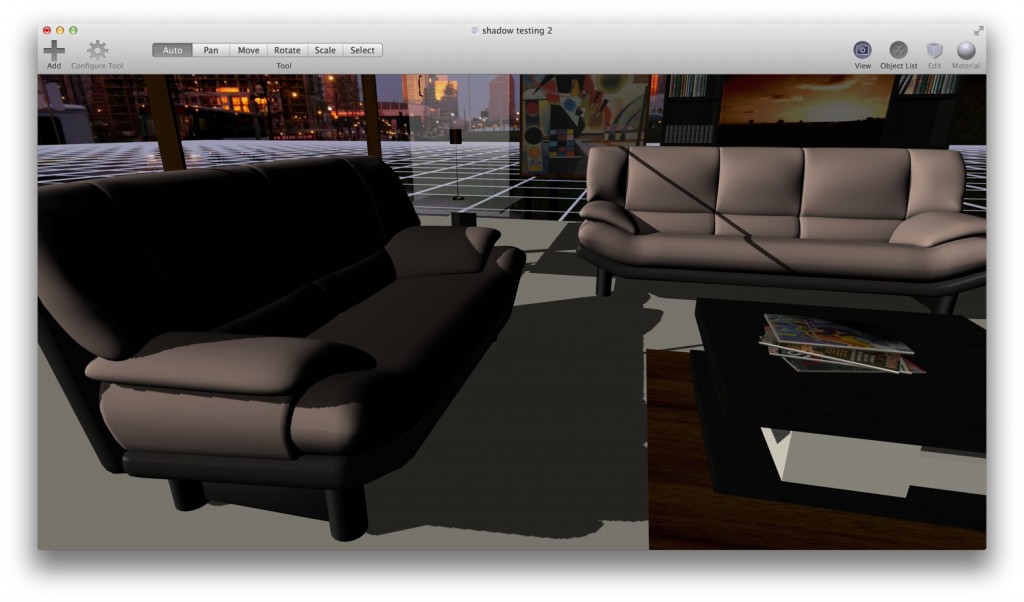
The results of all of this craziness is something quite nice. Shadows casted in my scene that can lie across curved surfaces. This was quite a bit of work but I think it’ll be quite worth it since now my graphics engine is shadow-capable. Down the road I’d like to add point-light shadow capability via rendering into shadow cubemaps and general shadow capability for Verto Studio, but for now, directional light shadows satisfies the needs of my game project.


